Penelope is currently growing out her bangs. For anyone who has been through this (toddler or not) we all know what an annoyance it can be. Often times the bangs stay at such an awkward length and fall in your eyes, tickle your face and just plain bug you! This is where hair clips come in. Hair clips are your best friend as you grow out your bangs. Penelope has grown quite the collection of hair clips lately. She loves to coordinate her outfits and has fun choosing a clip each morning….however, it is becoming a bit messy and a little hard to keep track of the clips she has. They are all shoved into a tiny box and it makes her take forever to pick out just the right one.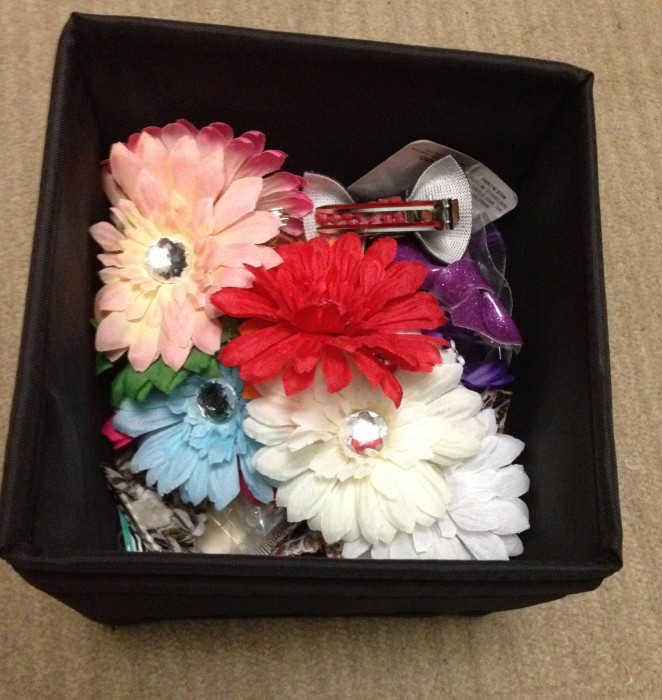
As I was cleaning up the house today, a solution popped into my head: why not make a cute hair clip holder to hang on her wall?!?! so I got to work and here is what I came up with!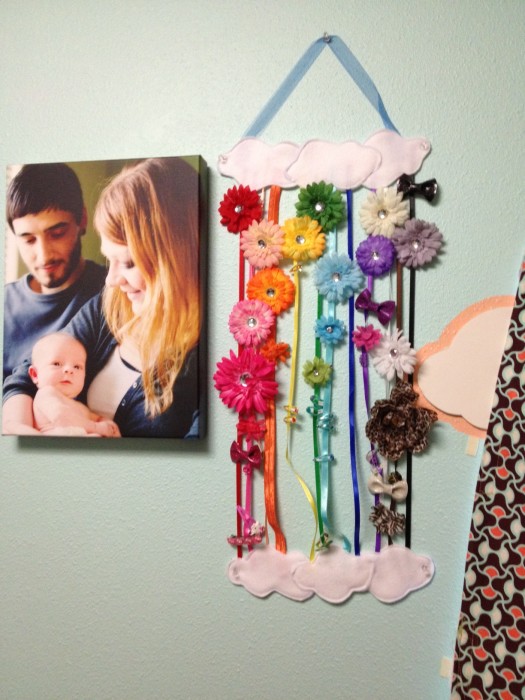
Are you already thinking: ” need one of those!!!” ? well…look no further! Below is a quick tutuorial on how I made this cute rainbow hair clip holder.
YOU WILL NEED: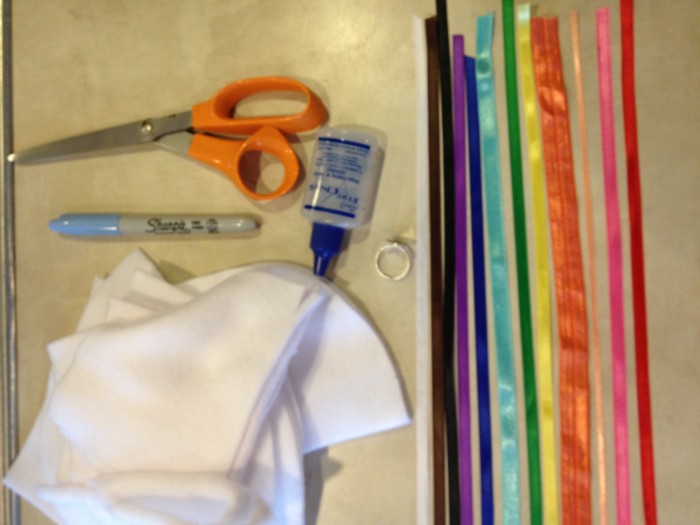
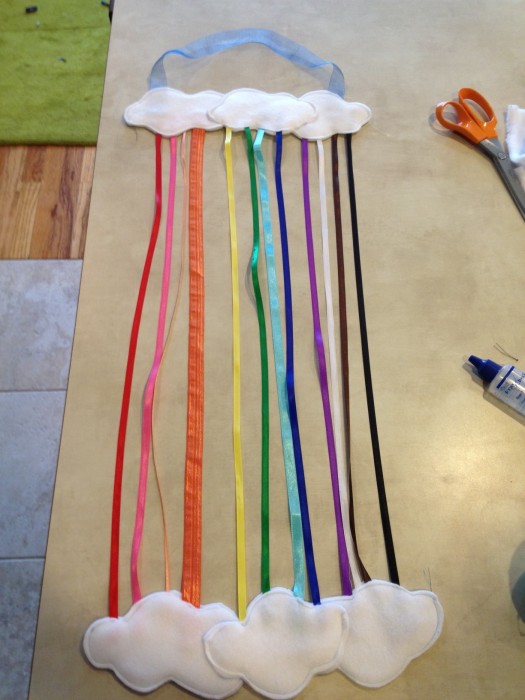
- different ribbons in the colors of your choosing cut to the length of your choice (depending on how big you want yours) mine were cut to about 20″
- white fleece (or felt)
- a sharpie
- scissors
- a sewing machine (or glue gun if you would rather glue this whole project together
- a ribbon to hang it with
STEPS:
-
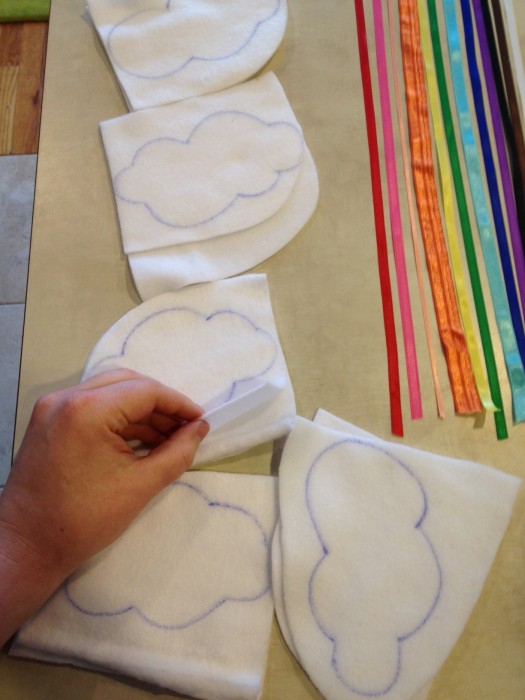
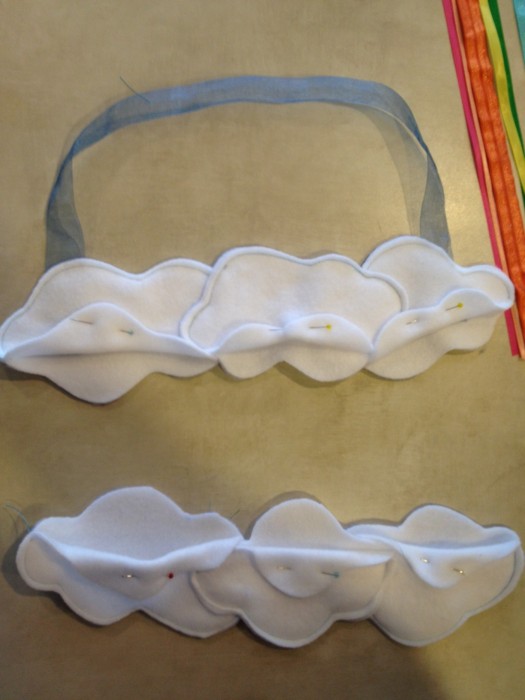
doubling up your fleece so it is twolayers, use your sharpie to draw cute random cloud shapes on six sets of fleece
-
cut out your clouds. You will have six sets of clouds.

-
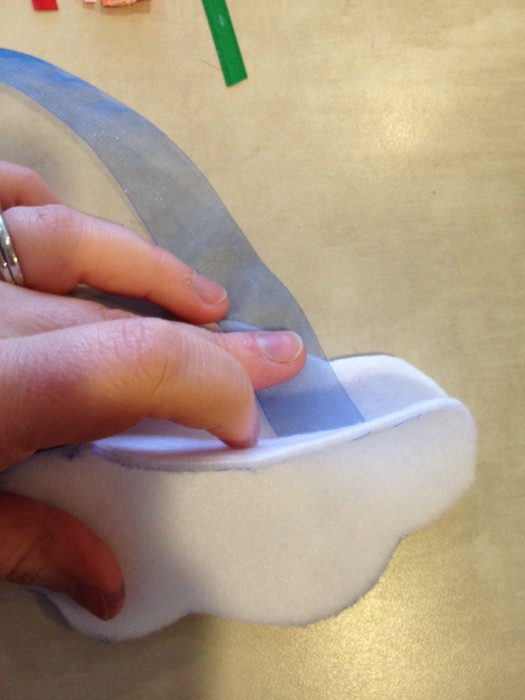
pin your hanging ribbon between the layers of two clouds.

-
sew the ribbon in by sewing the cloud layers together around the edges. be sure not to sew the bottoms shut though!!!
-
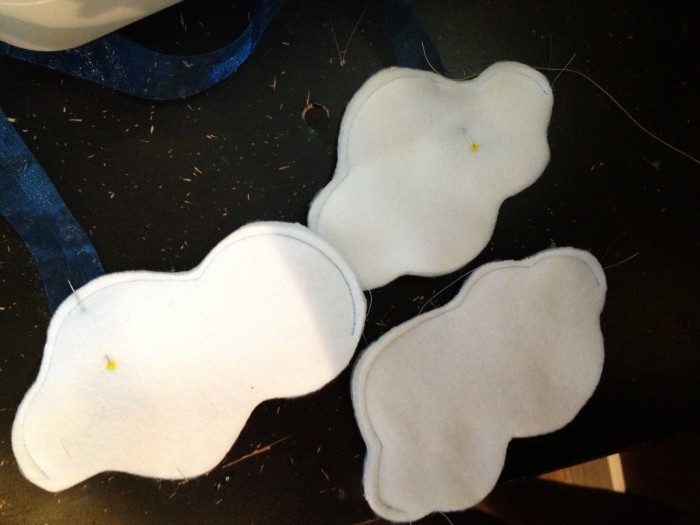
take your third cloud and sew the top of it shut as well and then sew it into the middle of the other two clouds that have the ribbon hanger. then follow the above cloud steps (minus the ribbon hanger) for the bottom three clouds. (be sure to only sew the tops shut and not the bottoms!!
-
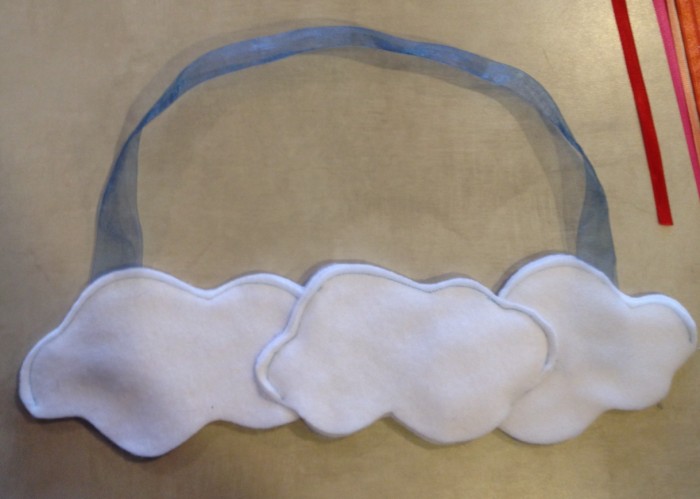
fold back and pin the top layer of each cloud on both cloud sets.
-
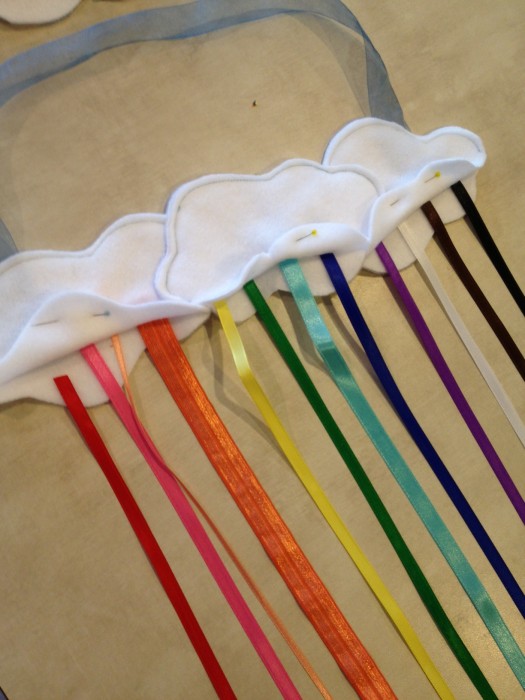
lay your ribbon between the layers of the top clouds (the ones with the hanger) and then lay the top cloud layer over the ribbon
-
pin the ribbons in place while sandwiched between the clouds.
-
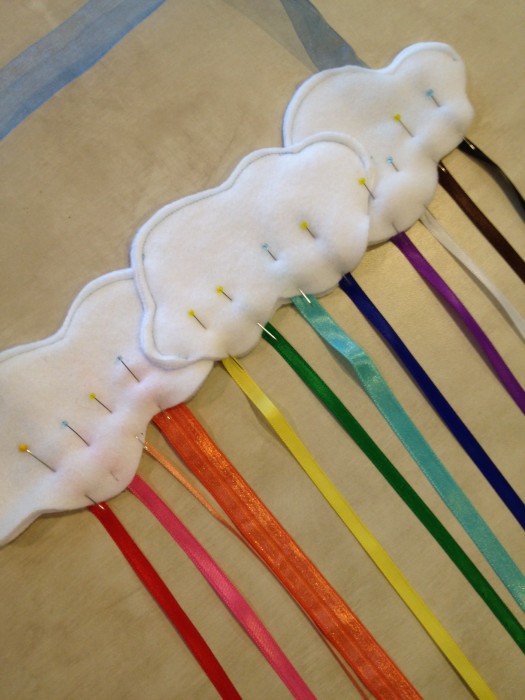
sew the bottom of the clouds shut, securing the ribbons in between the layers.
-
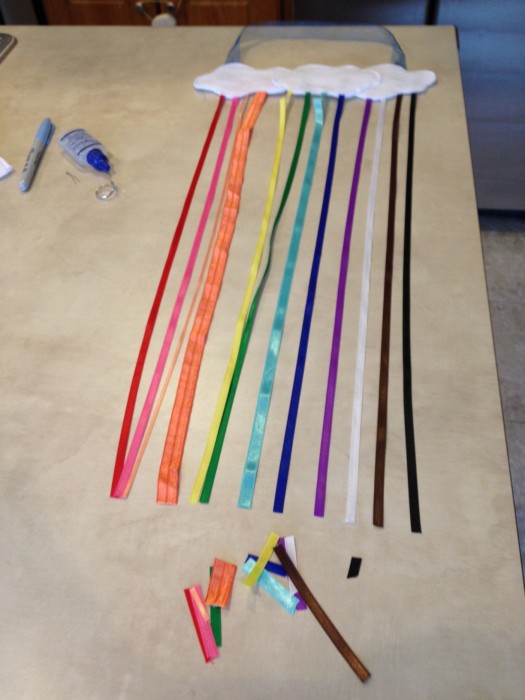
cut off the bottoms of the ribbon to even them up and then follow the steps you just did to sandwich the ribbon into the bottom set of clouds.
-
voila! hang your rainbow up on the wall! (I ended up having to pin the clouds down to the wall so they wouldn’t fold out….this was just something I made up as I went along….so if you just want it to hang without pinning the clouds to the wall, I suggest you insert cardboard or something rigid into the clouds before inserting the ribbons. )
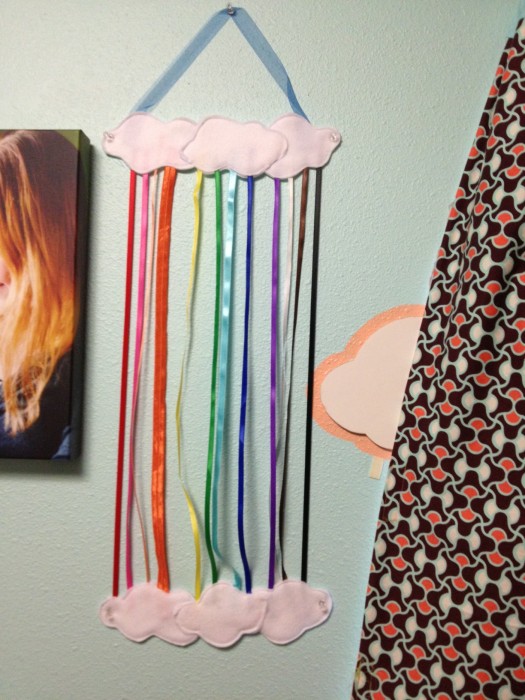
There you have it! A super cute, color organized rainbow hanger to keep track of all your clips! Do you readers out there have any other storage problems you would like another cute solution to??!