
It’s that time of year! The stores are filled with pink and red displays, the candy is flowing and sweethearts everywhere are searching high and low for a gift and a greeting card that says just the right thing. However, if you are anything like me, you will look at the price tag on a greeting card, cringe and quickly put it back. It’s not just the overpriced little piece of card stock that gets me, it’s also the thought that thousands of others are giving the exact same thing to their loves. I guess I just like to feel a bit more original…and I love to save money!
Today I’m going to show you how to make a creative, fun card yourself for just a bit of money. You can find what you need at your local craft store and you can make the entire project for under $1.00 by using things you may already have in your home.
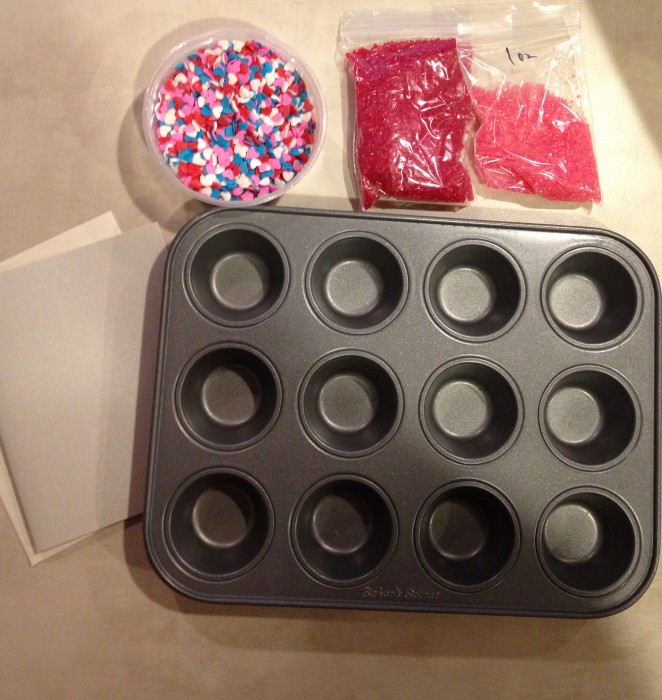
You will need:
- a mini muffin pan
- make it and bake it plastic crystals in your desired color…..(now you remember those fun window hangers you made as a kid? you filled in a metal frame with little plastic crystals, baked it and voila! a beautiful stained glass charm! well, if you go to your local Michaels Craft Store and look in their dollar bins you will find little make it and bake it kits! They are super cheap and will come with a few colors. Pick out the pack that has the colors of your choice and feel proud of yourself….or be a crazy lady like me and go on ebay, look up the crystals and order yourself a whole pound of different colors. Trust me, after you play with them you will want to do this…)
- hot glue gun and glue
- a pre made blank card or a piece of cardstock to fold and make a card from
- a ball point pen to write your message
- embossing supplies if you want to emboss your message
- a sharpie marker of your choosing
- glitter, rhinestones or anything else you may want to decorate your card further. (ignore the sprinkles…I used them in the lens on my first try but they just burnt and turned black lol)
Directions:
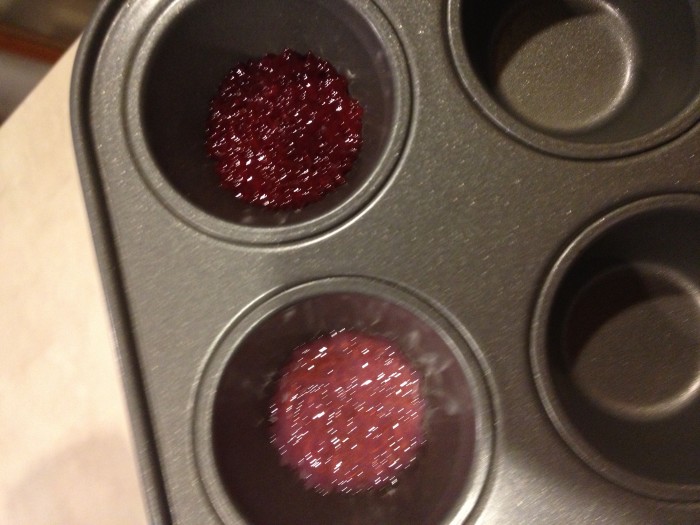
- fill two muffin tins at the bottom only with the colors of your choice. they should be 1/8″-1/4″ full
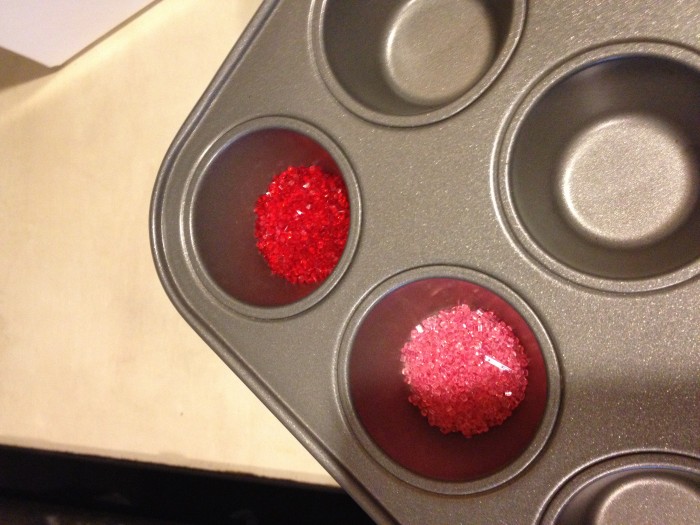
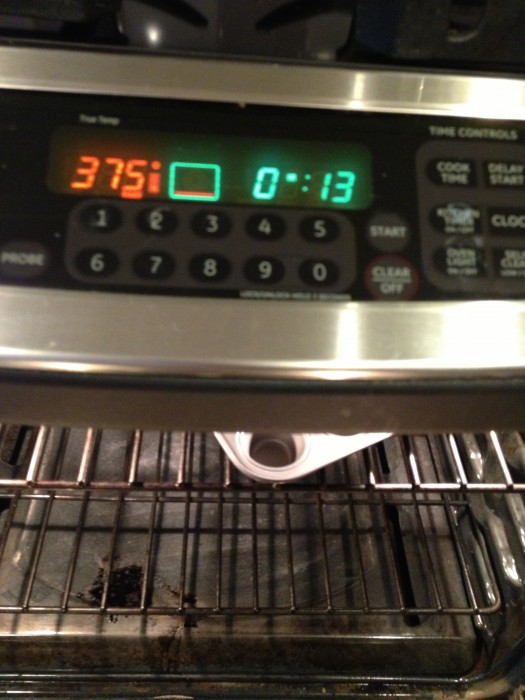
- put them into a pre heated oven at 375 degrees for 15 minutes
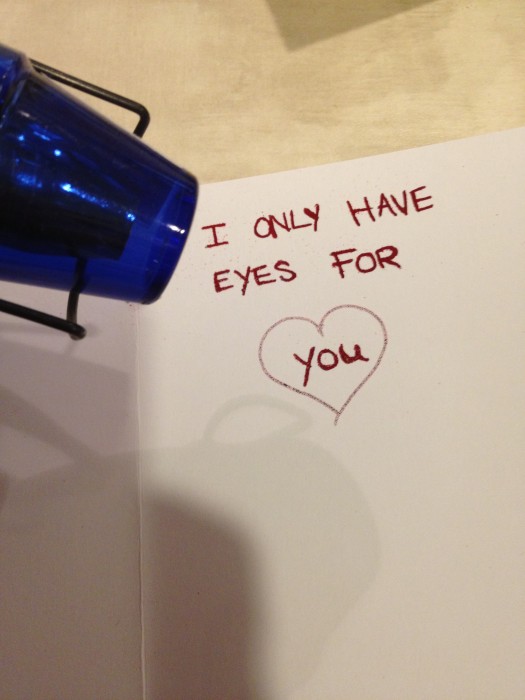
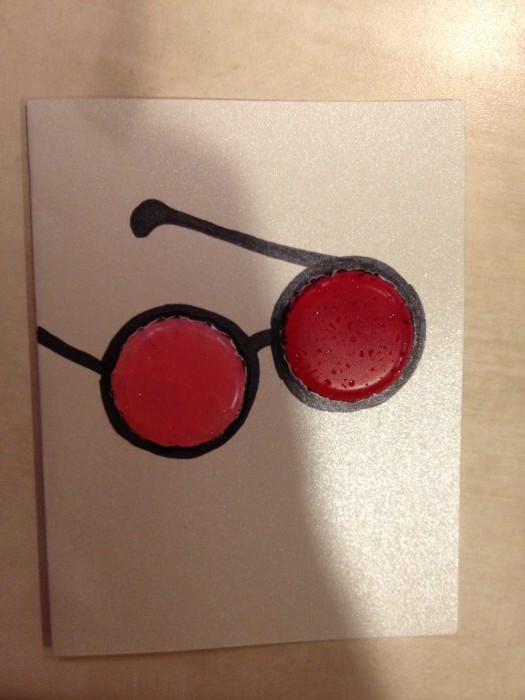
- In the meantime take your card (or card stock you made into a card by folding it into fourths) and write your heartfelt message on the inside. Since we are making love glasses on the front I wrote “I only have eyes for you”
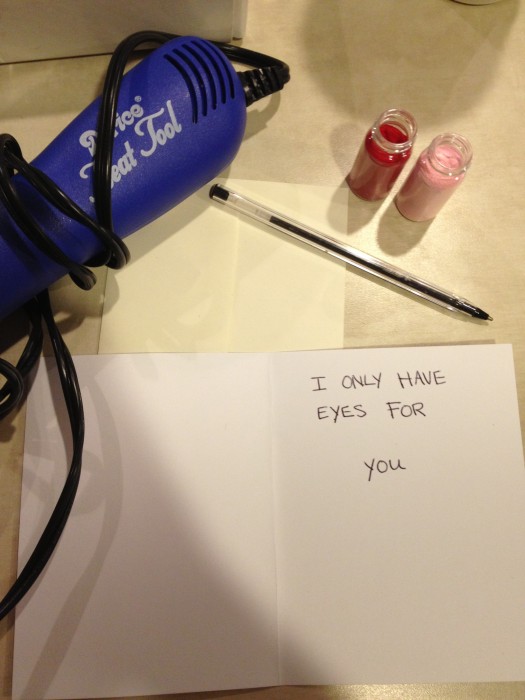
- You can leave it plain or if you have the supplies and want to, go ahead and emboss it!
- by this time your oven timer should be just about to go off. Take out your muffin pan and let it cool for a good 15 minutes.
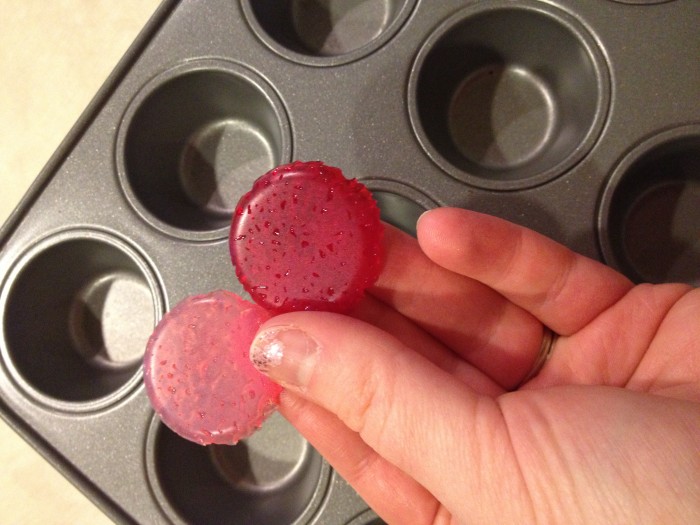
- using a fork, carefully remove your “lenses” from the muffin tins
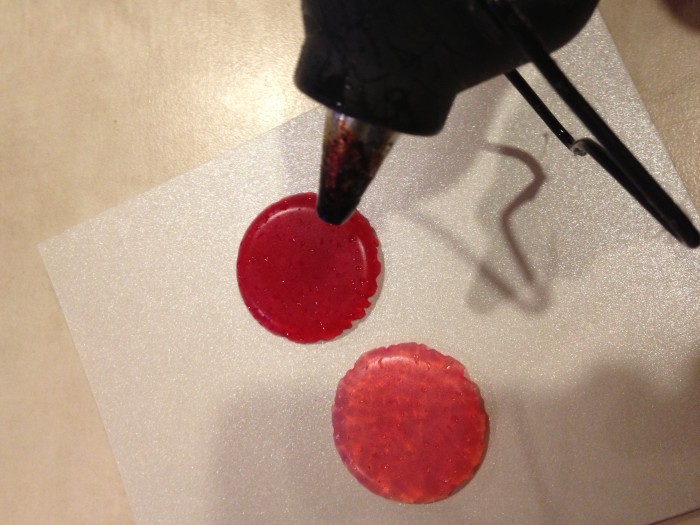
- Using your hot glue, apply the lenses to the front of your card like they are glasses.
- Use your sharpie to draw out the frame of the glasses
- Decorate further with glitter, hinestones or whatever your little in-love heart desires!
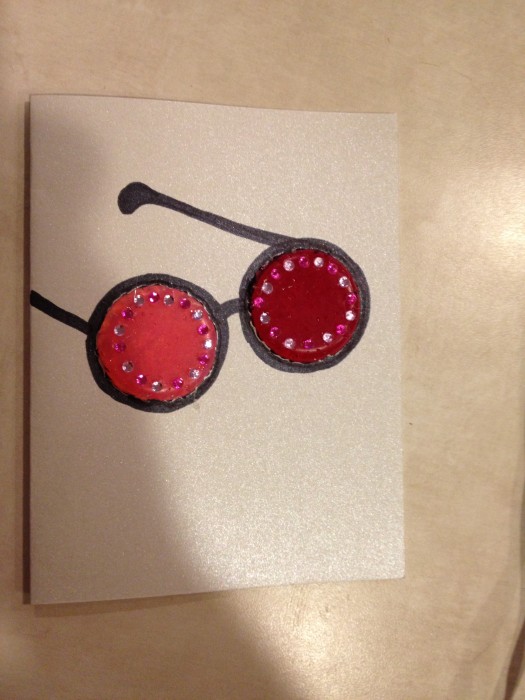
There you have it! You made a beautiful little 3D card for your sweetheart! Feel free to continue to decorate it as you see fit…glitter, rhinestones, etc. Make it your own!